We received a littleBits basic kit with instructions to create a fun project. I had no idea how fun the project was going to be. Our littleBits came with a guide book with ideas for projects such as a tickle machine, prank handshake, flashlight, windmill, and more.
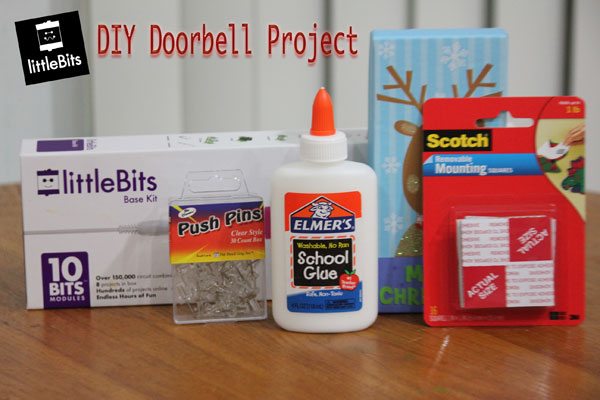
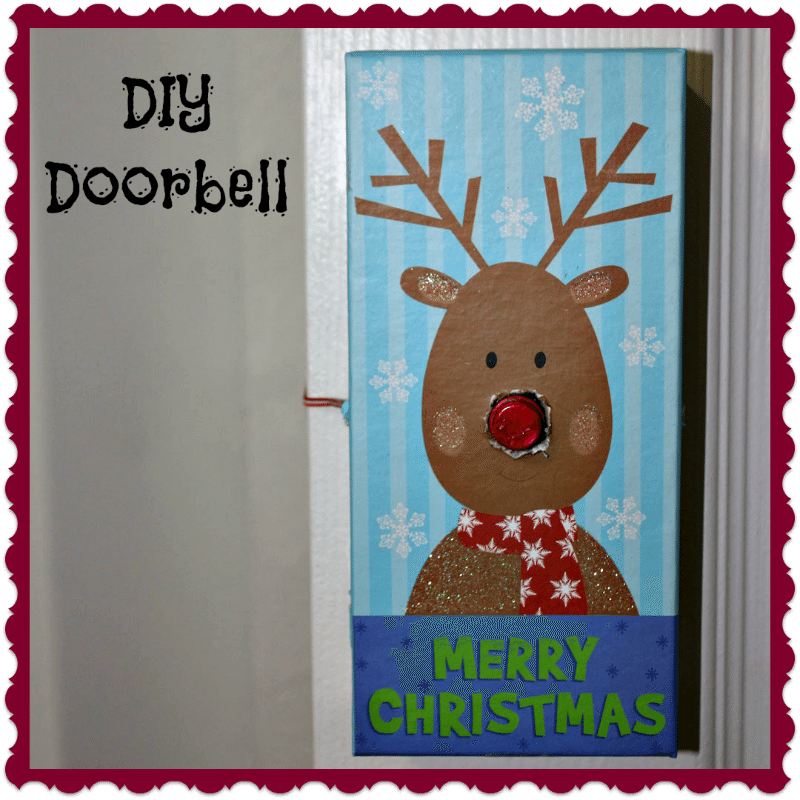
Originally I thought this would be a good project for my older son. However once I saw the doorbell I knew that Honey would love to do this project herself. She may be only eight years old but she enjoys her privacy and often has her door closed with a sign that says, “Please Knock”. I think it is just a girl thing. We took a trip to the dollar store to get supplies. Originally we were going to decorate a card board box (per the instructions), but we found the cutest money holder type box (pictured above) and Honey decided she wanted to use it instead. We got all our supplies together which were pretty easy to find around the house push pins, glue, scissors, tape, etc. and sat down to get started. As I was looking at the directions, reading them in full first, Honey had already had all the electronic pieces together.
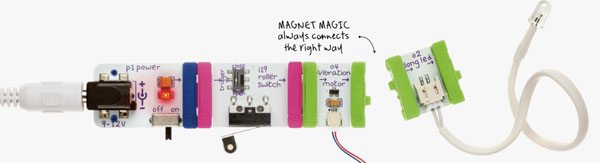
I cringed thinking that these are electronics and it is important that things are put together correctly or who knows what could happen. That is when my daughter showed me that they were magnetic. GENIUS! This means that you can not put the pieces together wrong. We tested it out to be sure and sure enough if you try to put to wrong pieces together the magnets will repel and force each other apart. Since we are dealing with electronics and in our case a child I thought this was just such an amazing feature.

Our project took us a little bit of time simply because of our creative genius. As I mentioned the box Honey chose was a reindeer (I found during this project that reindeer’s are Honey’s favorite Christmas symbol), and Honey wanted the door bell to replace the reindeer’s nose. So we had to get all the electronics in the right place so it could pop through the box where we needed it. Then we decided lets go further and we painted the white doorbell red to create Rudolph! We had a ton of fun with this project.
How the littleBits Work
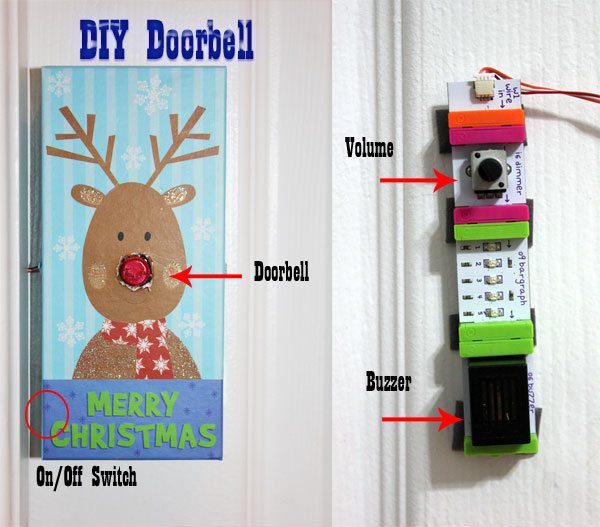
We used double sided tape to secure the parts inside the box. We cut a hole in the side so the switch to door the doorbell on and off was reachable. The box is secured to the door with removable two sided tape. There is a wire coming out of the side of the box and wrapping around the door. On the inside of the door is the buzzer. You can also increase or decrease the volume of the buzzer to your liking. We decided to take a short video so you could see how the buzzer works.
littleBits DIY Doorbell
littleBits Coupon Code
We had so much fun with the littleBits they are fun, creativity, and learning all in one little box. Right now my readers can get a special discount when purchasing an Exploration Kit. Use the coupon code smiles10 and get 10% (expires on 12/31/13)
What is your favorite Christmas symbol? Santa? Reindeer? Snowmen?
Disclosure: I received the above products and/or was compensated for this post.
